Jekyll onto the clouds!
So, I last attempted to setup a azure dev ops pipeline, to build my jekyll site into a web app, without complete success. I then investigated Azure Static Web Apps, which may well offer a suitable solution to hosting a blog/personal website.
As I had my jekyll site running locally, using a local docker image on my MacOS.
I followed these steps essentially:
Create the application
- Navigate to the Azure portal
- Select Create a Resource
- Search for Static Web Apps
- Select Static Web Apps
- Select Create
On the Basics tab, enter the following values.
- Property Value
- Subscription Your Azure subscription name.
- Resource group jekyll-static-app
- Name jekyll-static-app
- Plan type Free
- Region for Azure Functions API and staging environments Select a region closest to you.
- Source GitHub
Select Sign in with GitHub and authenticate with GitHub.
- Enter the following GitHub values.
- Property Value
- Organization Select your desired GitHub organization.
- Repository Select jekyll-static-app.
- Branch Select main.
In the Build Details section, select Custom from the Build Presets drop-down and keep the default values.
- In the App location box, enter ./.
- Leave the Api location box empty.
- In the Output location box, enter _site.
-
Review and create
- Select the Review + Create button to verify the details are all correct.
- Select Create to start the creation of the App Service Static Web App and provision a GitHub Action for deployment.
- Once the deployment completes click, Go to resource.
- On the resource screen, click the URL link to open your deployed application. You may need to wait a minute or two for the GitHub Action to complete.
and ending up with this file in my github repo under workflows/azure-static-web-apps-wonderful-forest-0453ab600.yml
name: Azure Static Web Apps CI/CD

on:
  push:
    branches:
      - main
  pull_request:
    types: [opened, synchronize, reopened, closed]
    branches:
      - main

jobs:
  build_and_deploy_job:
    if: github.event\_name == 'push' \|| \(github.event\_name == 'pull\_request' && github.event.action != 'closed')
    runs-on: ubuntu-latest
    name: Build and Deploy Job
    steps:
      - uses: actions/checkout@v2
        with:
          submodules: true
      - name: Build And Deploy
        id: builddeploy
        uses: Azure/static-web-apps-deploy@v1
        with:
          azure_static_web_apps_api_token: $
          repo_token: $ # Used for Github integrations (i.e. PR comments)
          action: "upload"
          ###### Repository/Build Configurations - These values can be configured to match your app requirements. ######
          # For more information regarding Static Web App workflow configurations, please visit: https://aka.ms/swaworkflowconfig
          app_location: "./" # App source code path
          api_location: "" # Api source code path - optional
          output_location: "_site" # Built app content directory - optional
          ###### End of Repository/Build Configurations ######

  close_pull_request_job:
    if: github.event_name == 'pull_request' && github.event.action == 'closed'
    runs-on: ubuntu-latest
    name: Close Pull Request Job
    steps:
      - name: Close Pull Request
        id: closepullrequest
        uses: Azure/static-web-apps-deploy@v1
        with:
          azure_static_web_apps_api_token: $
          action: "close"
Summary of the latest hosting setup
For now I’ll keep using Cloudflare Pages, as it’s tightly integrated with the DNS and CDN already in place, however I now have to ability to switch to another cloud provider should one fail, which is always handy.
AWS S3
For AWS, we have either a github action, such as this also an s3 server option. For the github based actions. the following workflow file would suffice:
name: CI / CD

# Controls when the action will run.
on:
  # Triggers the workflow on push for the main branch
  push:
    branches: [ main ]

  # Allows you to run this workflow manually from the Actions tab
  workflow_dispatch:

env:
  AWS_ACCESS_KEY_ID: $
  AWS_SECRET_ACCESS_KEY: $
  AWS_DEFAULT_REGION: 'us-west-2'

# A workflow run is made up of one or more jobs that can run sequentially or in parallel
jobs:
  build:
    runs-on: ubuntu-latest
    steps:
    - uses: actions/checkout@v2
    - name: Set up Ruby
      uses: ruby/setup-ruby@v1
      with:
        bundler-cache: true
    - name: "Build Site"
      run: bundle exec jekyll build
      env:
        JEKYLL_ENV: production
    - name: "Deploy to AWS S3"
      run: aws s3 sync ./_site/ s3://$ --acl public-read --delete --cache-control max-age=604800
    - name: "Create AWS Cloudfront Invalidation"
      run: aws cloudfront create-invalidation --distribution-id $ --paths "/*"
Google Firebase - bonus
For completeness to my multicloud journey, I should next investigate google firebase, perhaps this blog will assist me. I should point out that now, github allows a single private repo on their free plan. Ok, here it is, using a docker container to setup firebase CLI
docker run --name firebase --volume="$PWD:/srv/jekyll" -p9005:9005 --rm -it andreysenov/firebase-tools bashThen change directory into the /srv/jekyll directory, run
firebase login
copy/paste the URL into your browser, authorise the firebase CLI tools, then:
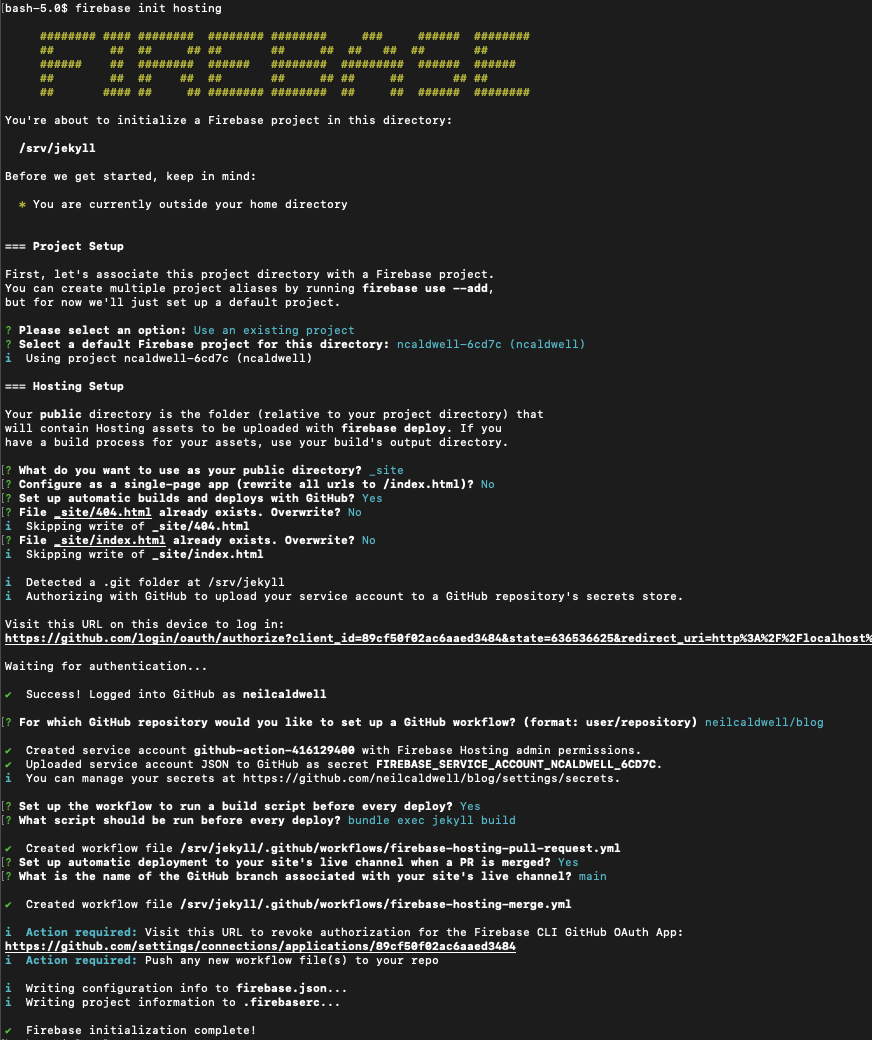
firebase init hosting

after a little testing, I found that the build command
- run: sudo gem install bundler && sudo bundle install --path vendor && bundle exec jekyll build
worked well, so the firebase-hosting-merge.yml ended up looking like
# This file was auto-generated by the Firebase CLI
# https://github.com/firebase/firebase-tools

name: Deploy to Firebase Hosting on merge
'on':
  push:
    branches:
      - main
jobs:
  build_and_deploy:
    runs-on: ubuntu-latest
    steps:
      - uses: actions/checkout@v2
      - run: sudo gem install bundler && sudo bundle install --path vendor && bundle exec jekyll build
      - uses: FirebaseExtended/action-hosting-deploy@v0
        with:
          repoToken: '$'
          firebaseServiceAccount: '$'
          channelId: live
          projectId: ncaldwell-6cd7c